Showing posts with label DIY. Show all posts

Thursday, December 14, 2017

The Making of DIY Boho Whimsical Antique Teapot Lantern Crystal Wire Wrapping Project VIDEO


I'm wrapping up my semester (probably my last one) at UMASS Boston. For my Cinema Studies Class "Experimental Film" we had the option of doing our own original work, so I made a condensed version of my documentary plus some other commentary to go along with my oral presentation. I was very very sick when I had my presentation, so there's no video footage of my presentation. But, I do have the clip.

Here's the Documented footage video I made:


And here's the clip I did for my UMASS Boston Presentation:


I actually also brought the lantern with me to the University for the presentation.


Saturday, July 29, 2017

DIY Boho Teapot Lantern Project: Finished Work n Photography DSLR


WHAT DOES IT MEAN?

I would like to distinctly distinguish and separate this from "crafts" or "arts & crafts" and present this as a work of art. The reason this is ART is because it means something. It has meaning, symbolism, and metaphor. It has philosophical meaning to it symbolically. 

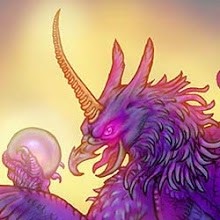
This was one an old broken, dented pewter teapot. A busted water vessel. It was viewed as junk, trash, useless, and ugly. 

There's an old Shaolin proverb "To hate is like a water vessel with a hole in it. It carries nothing but pain & suffering.

But, THIS vessel did't hold it's own hate, it wa sthe hate & loathing of those viewing it.

Yet, I saw it, and saw myself. 
The vessel is me. 
The pot is me.

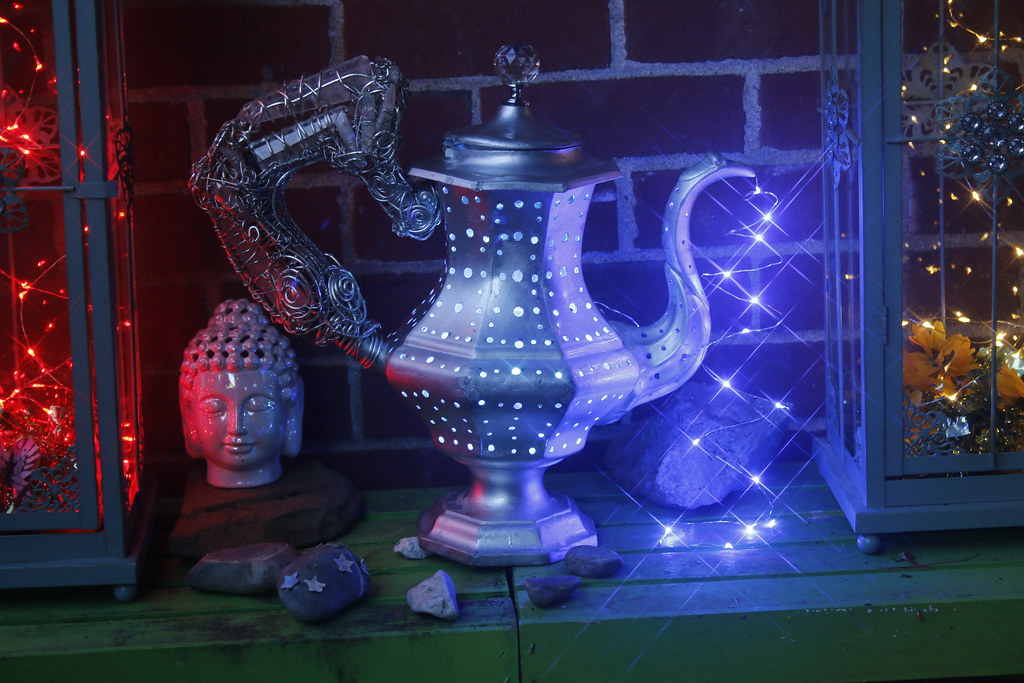
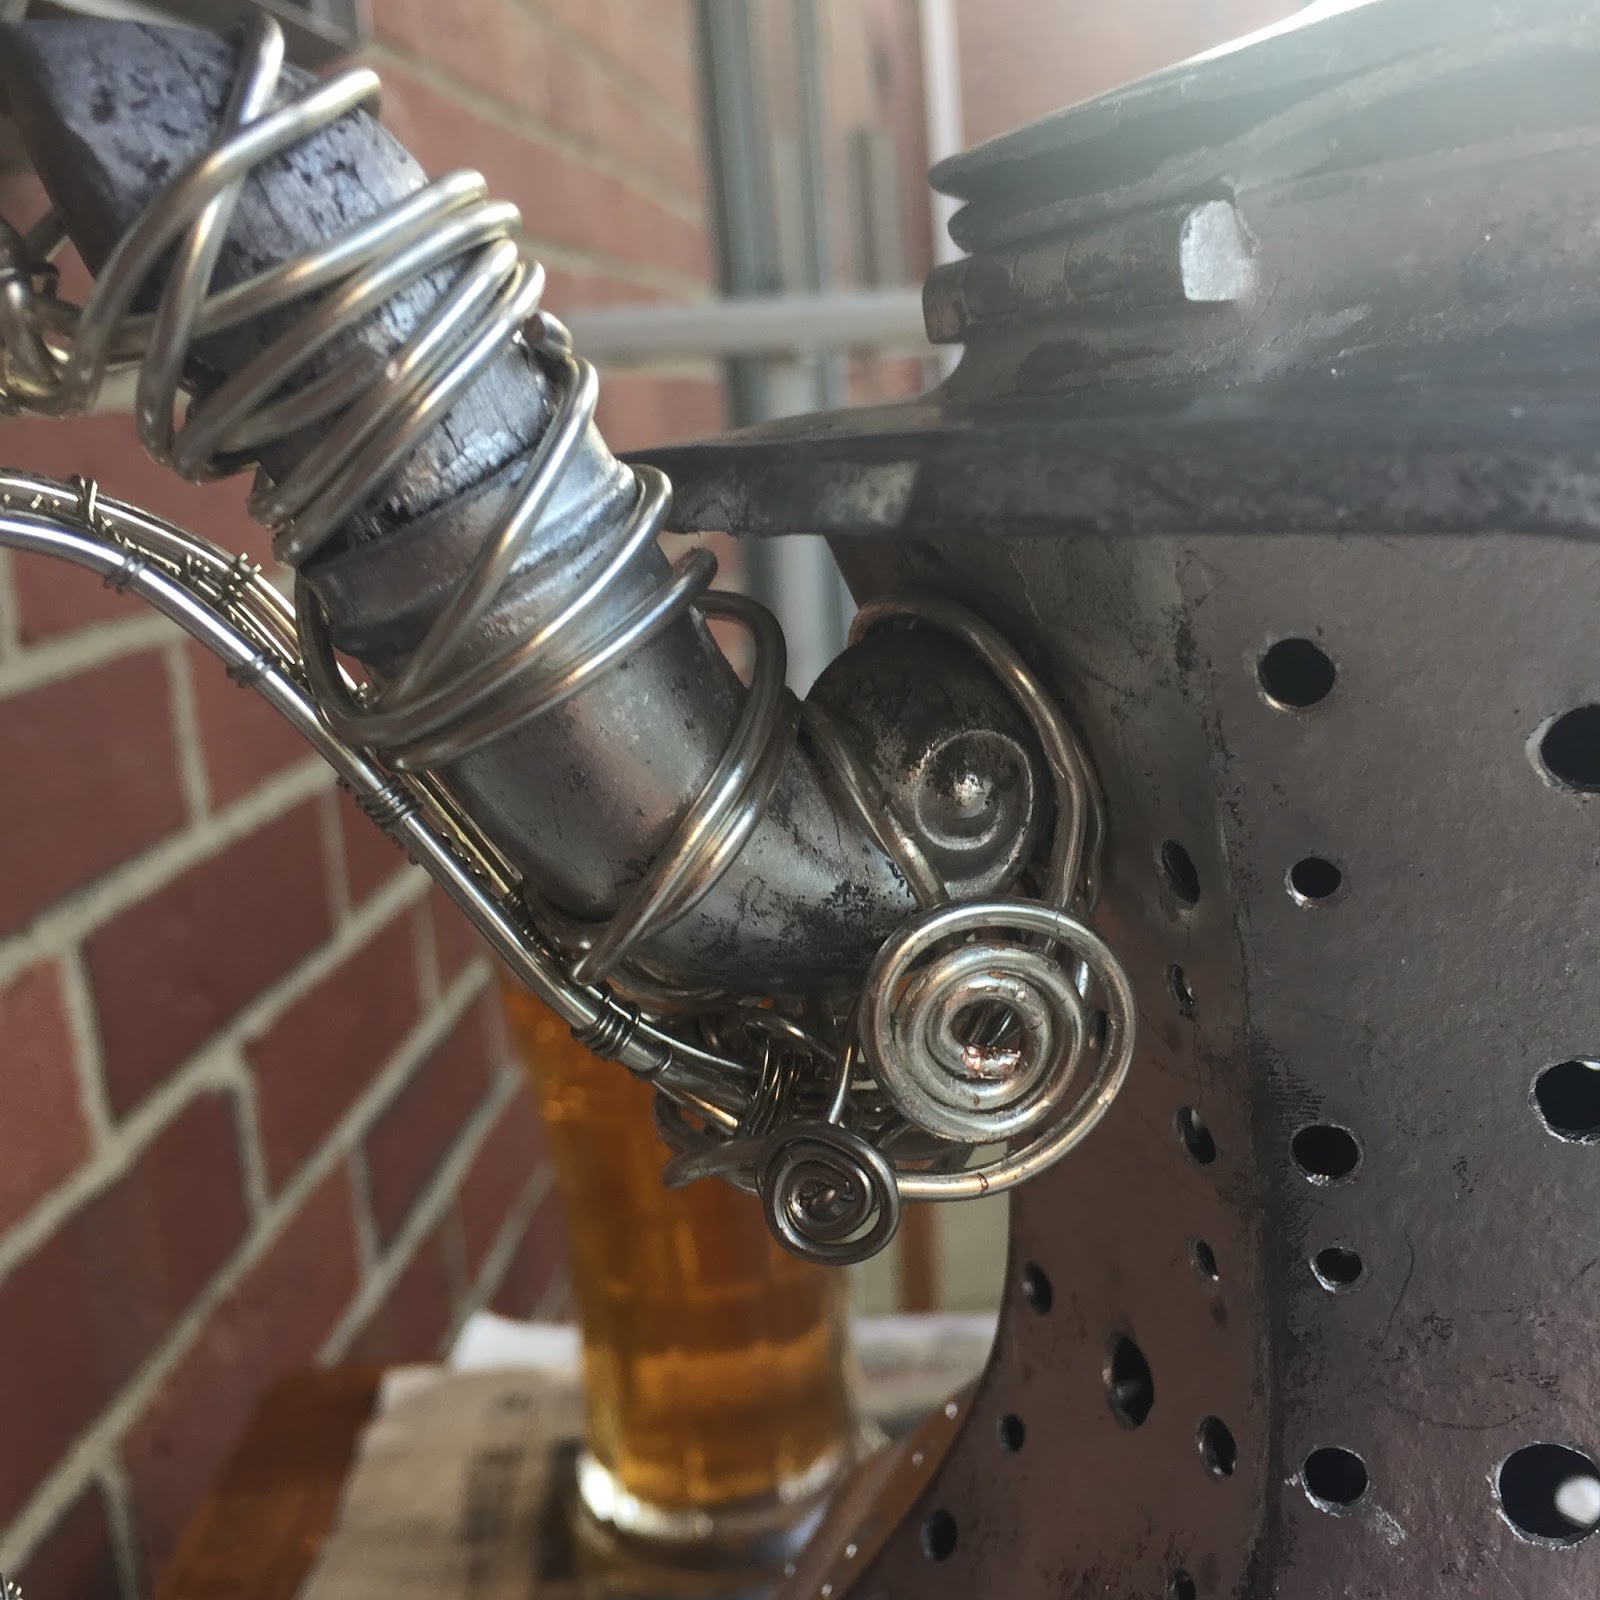
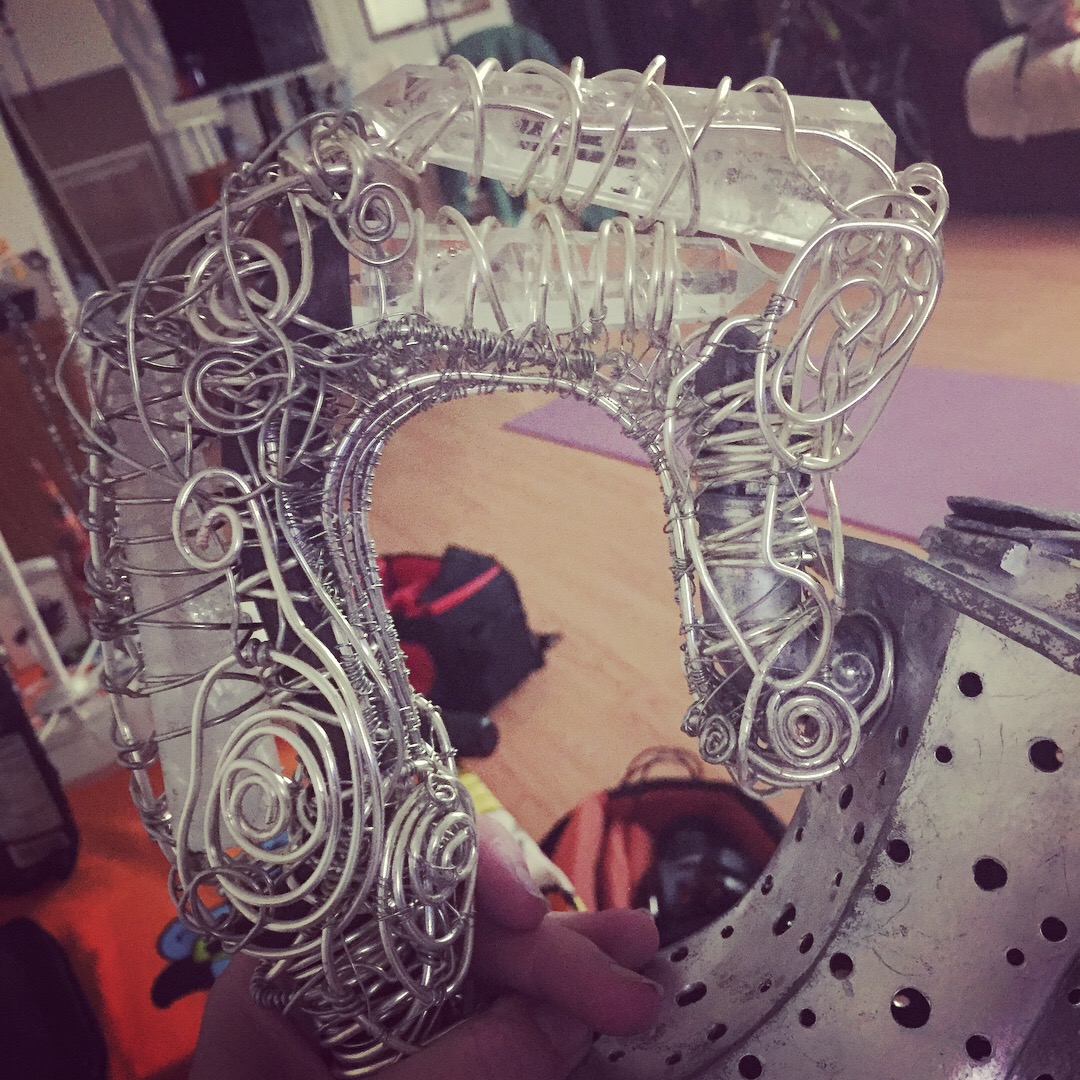
But, I drilled lots of holes in it... because now it is no longer a busted vessel, but a lantern.

In the Dao De Jing (Tao Te Ching) it makes mention of the emptiness of the home, the house, the door, the windows, that make it useful. Now, it doesn't hold fluid, but hold the lights, and lets the light out.

If the pot had NEVER been broken, and busted, it would NEVER have become a lantern. It would NEVER be a work of art appearing to pour light. It would never have become a work of art, and philosophical metaphor.

It was misunderstood. But, when I saw it, I understood myself, because I am not my misfotunes, or victimhood(s).

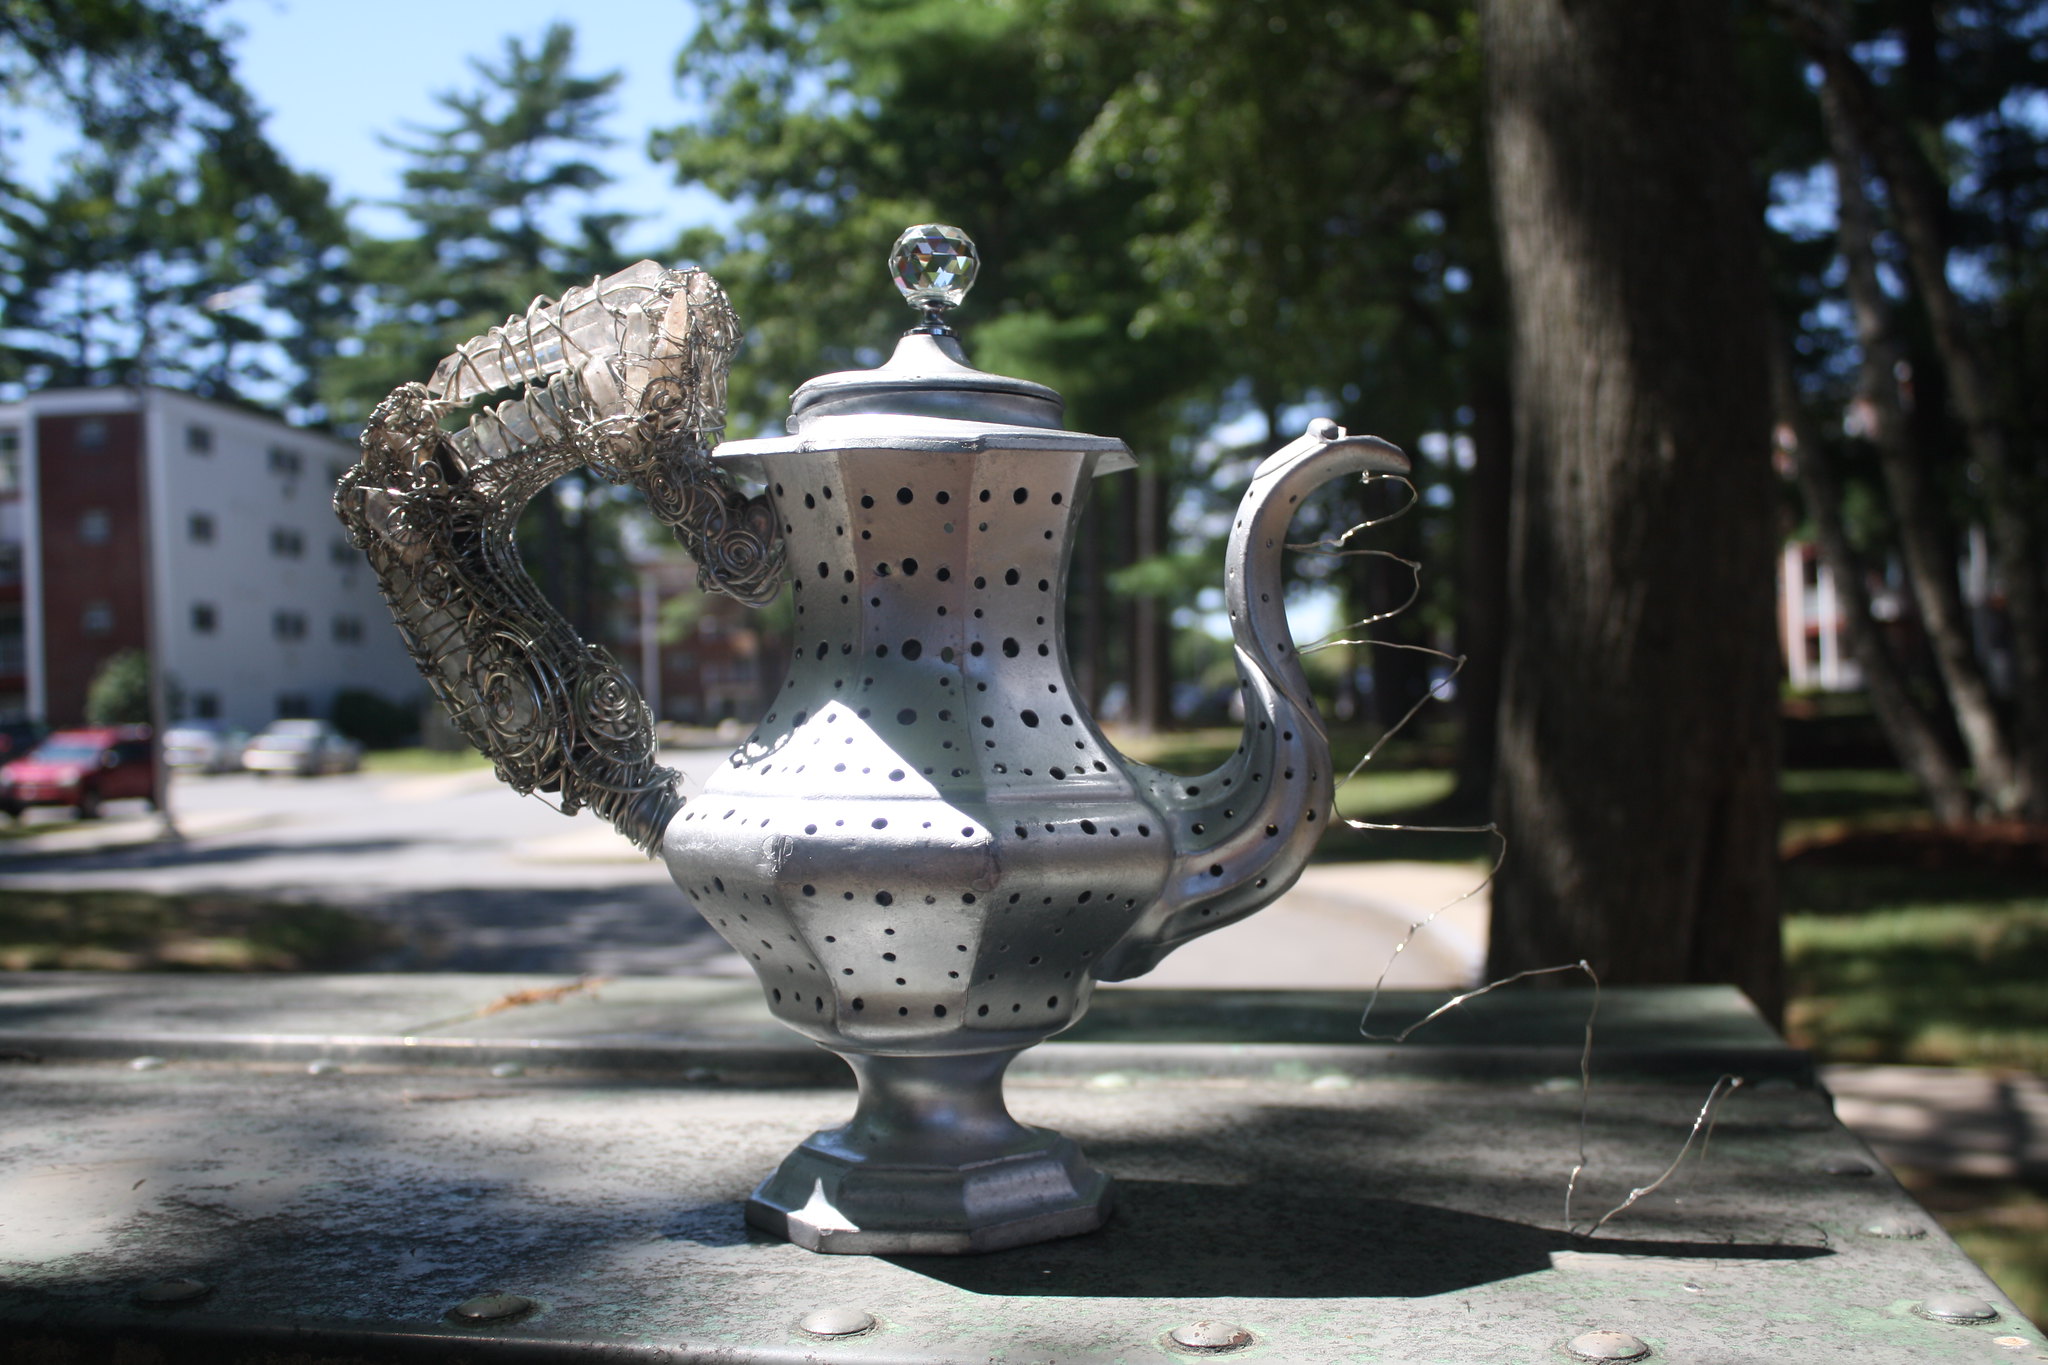
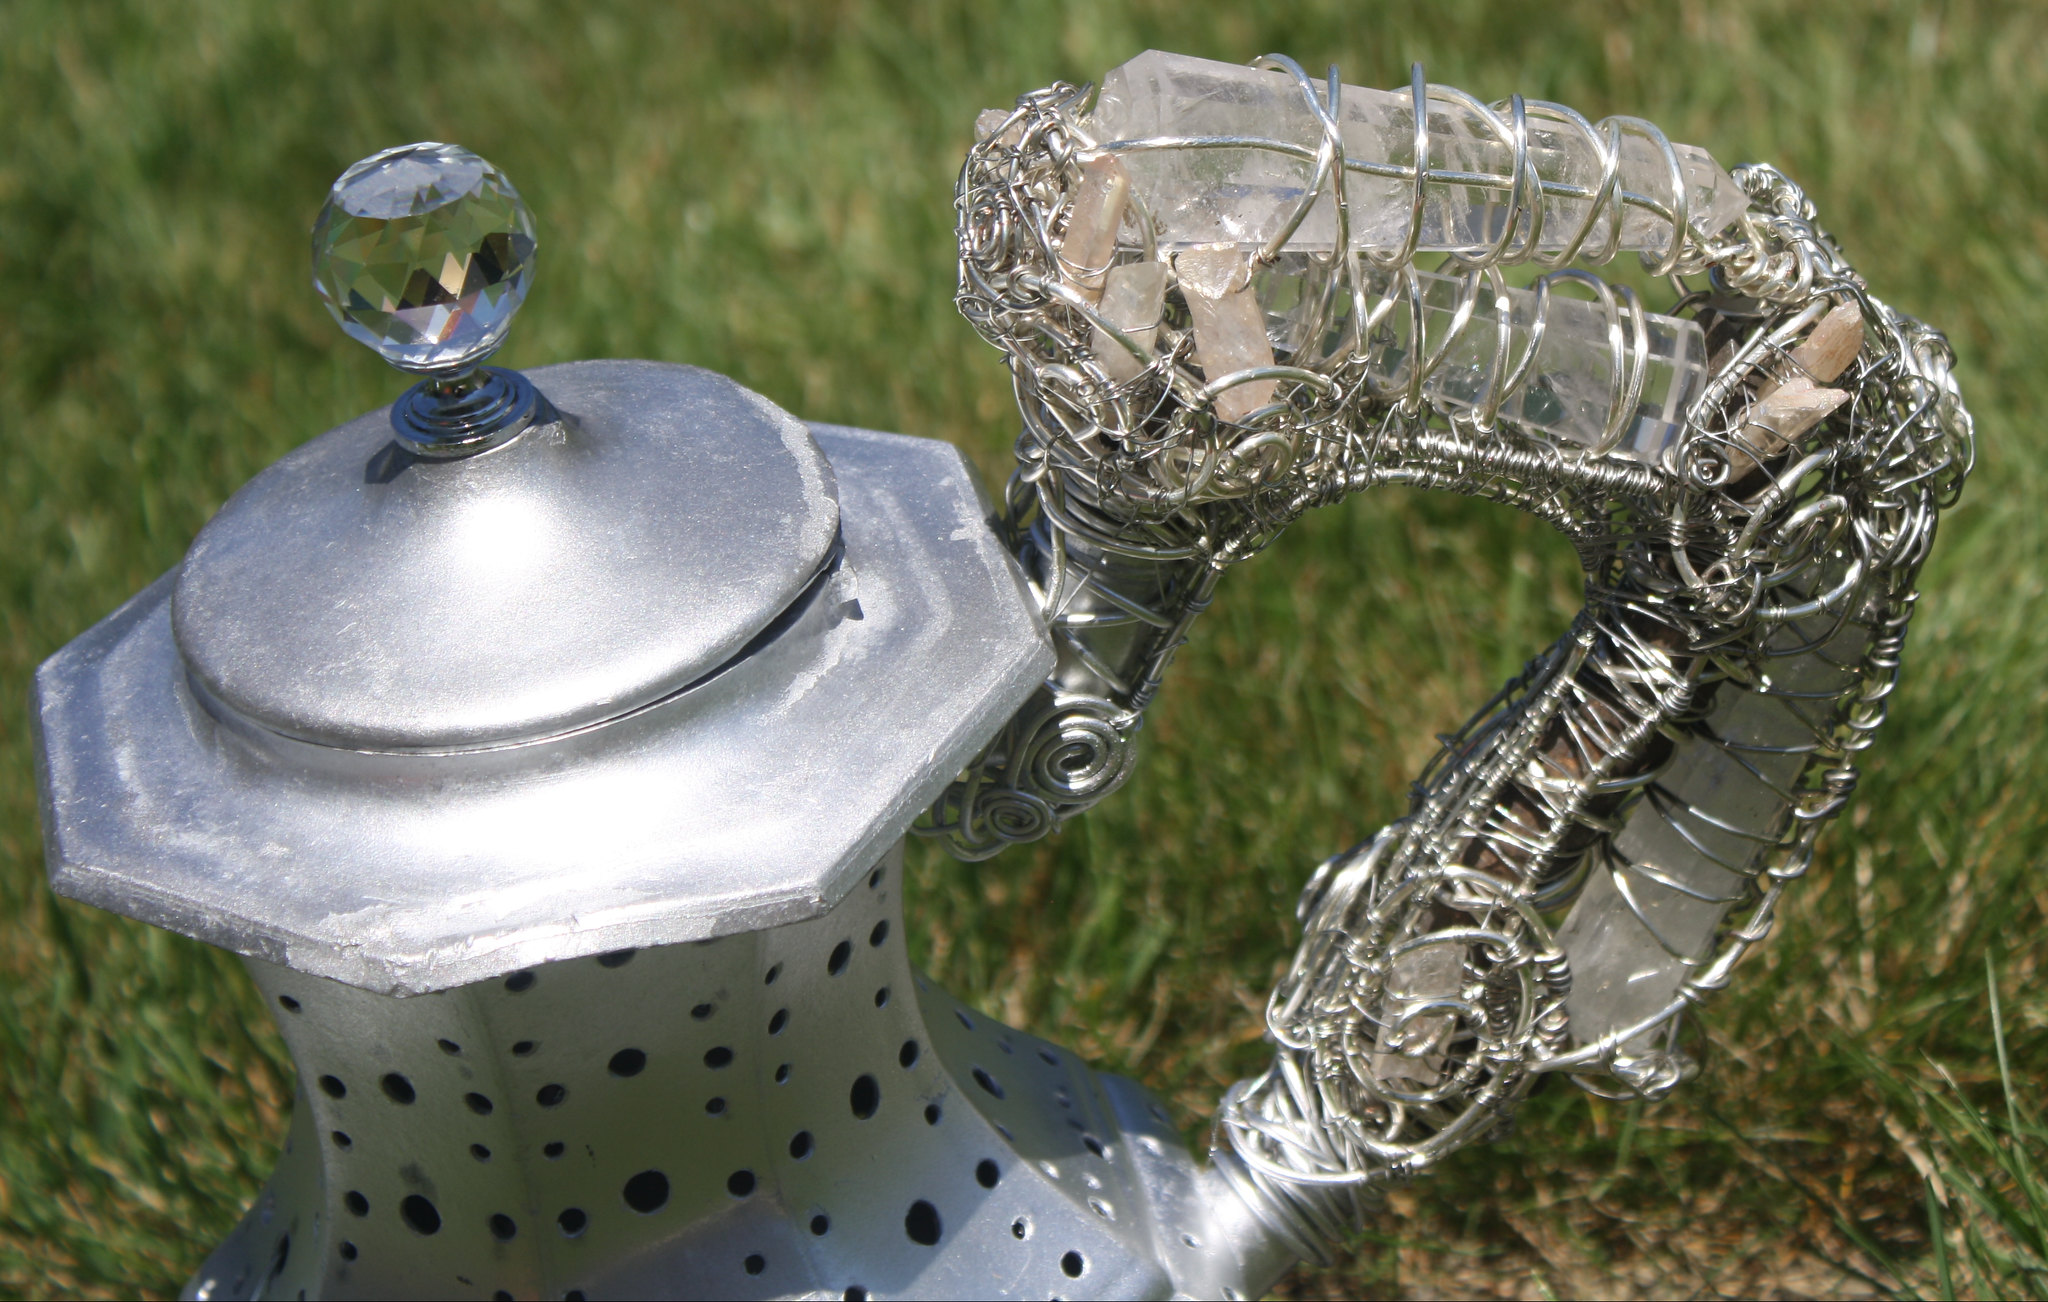
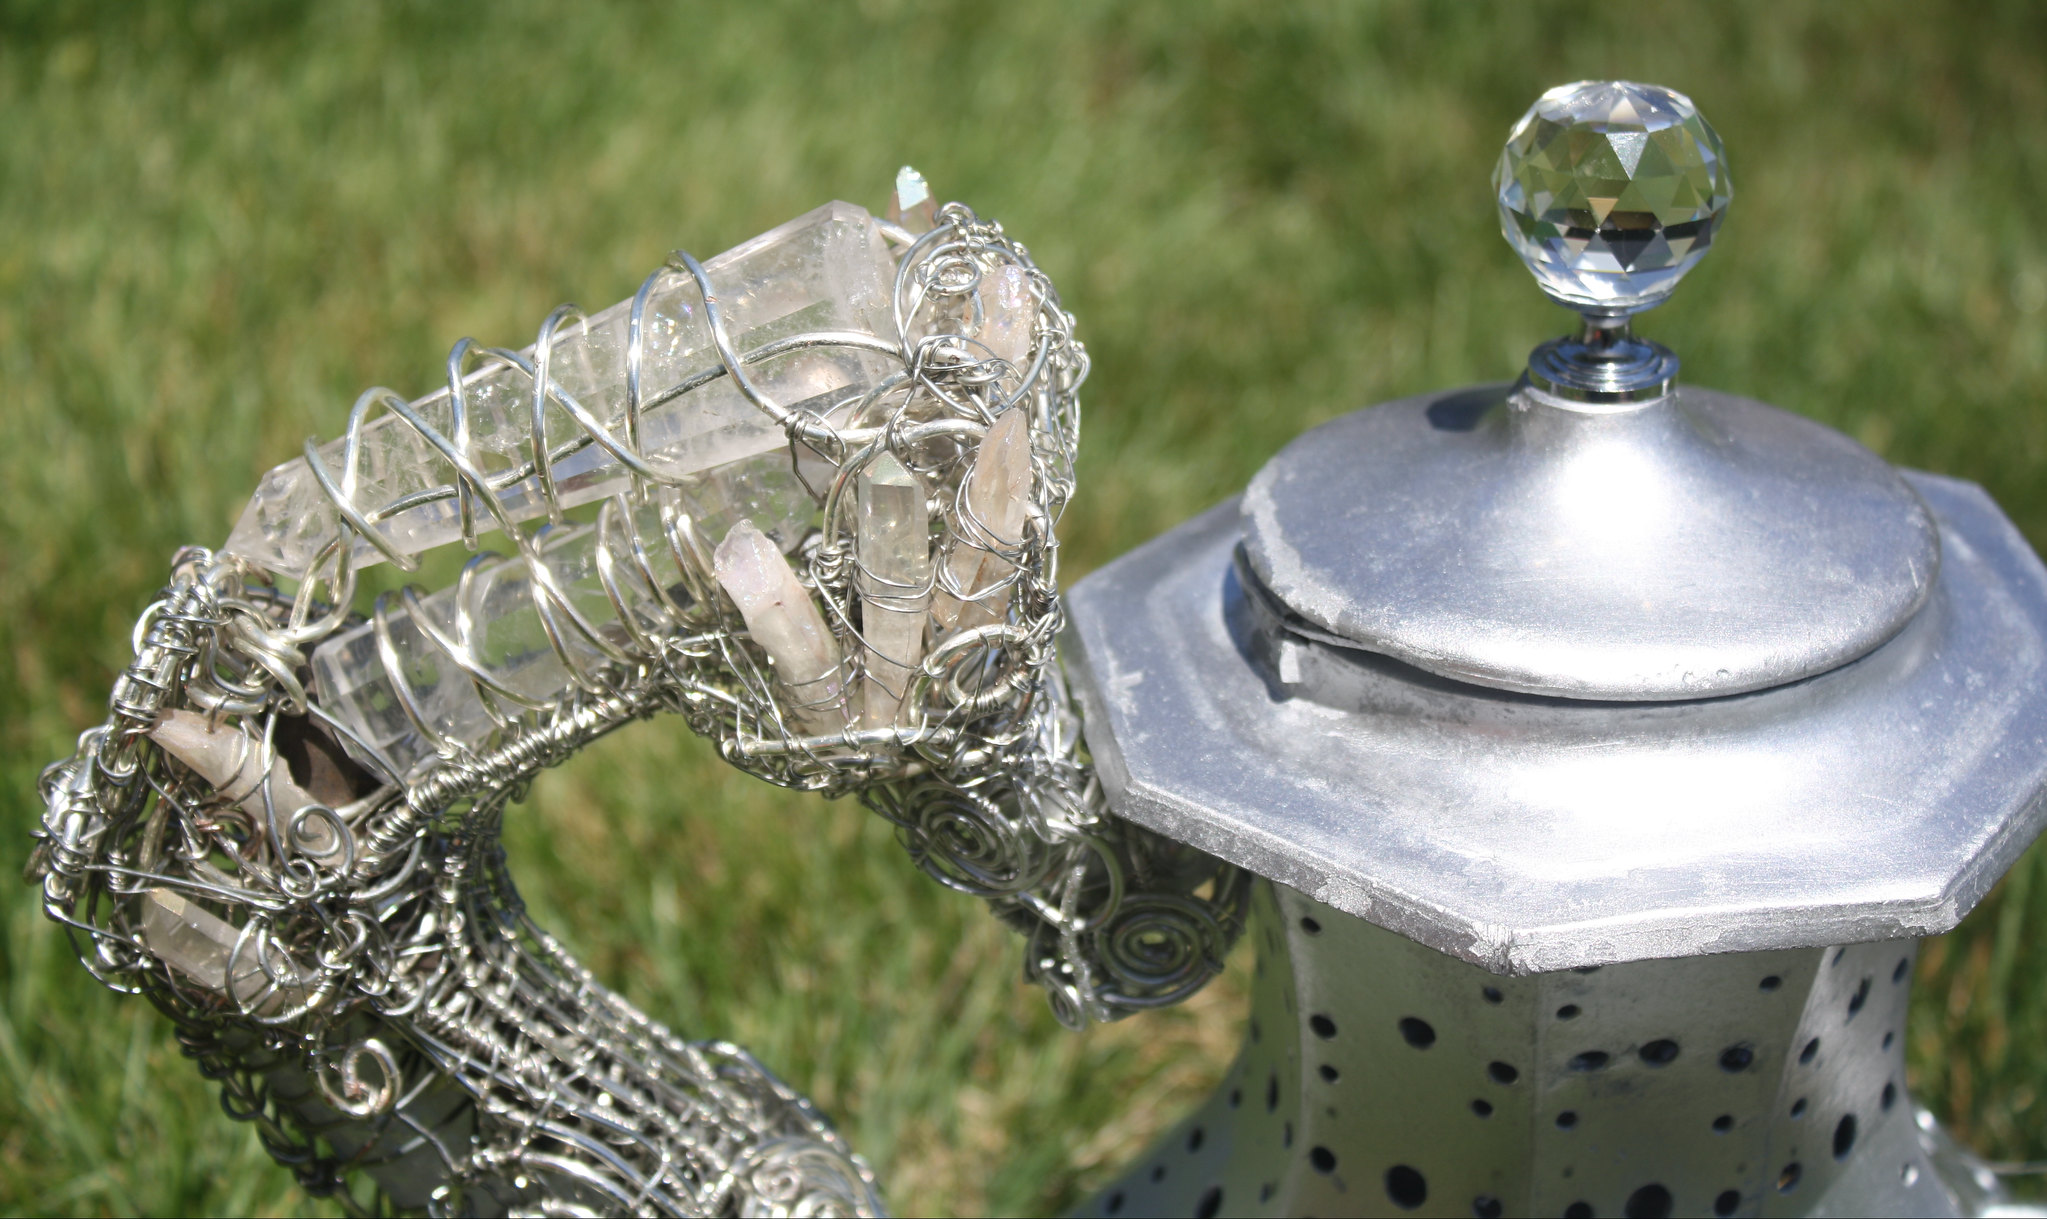
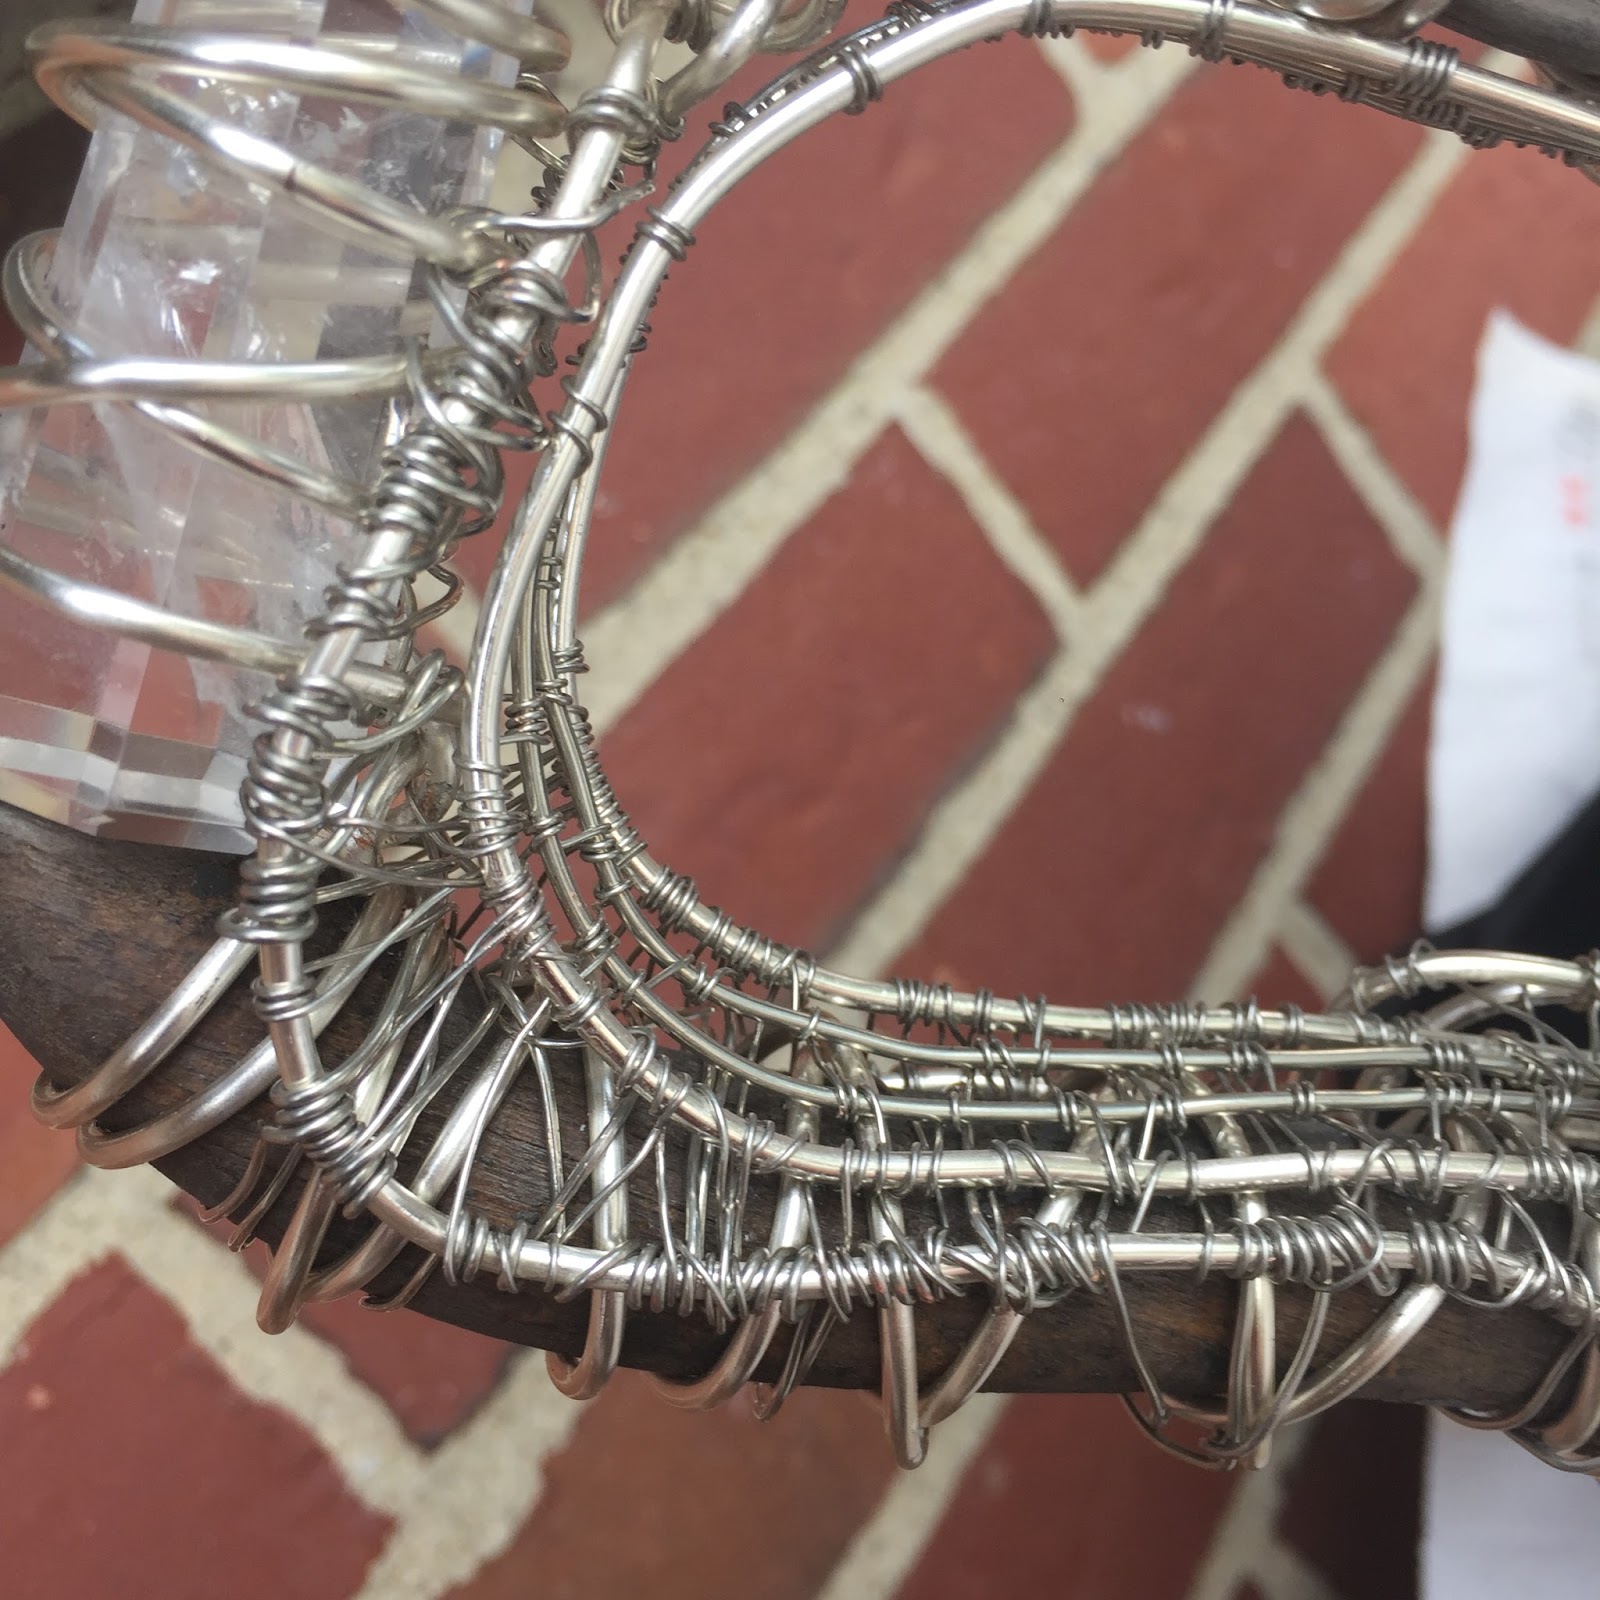
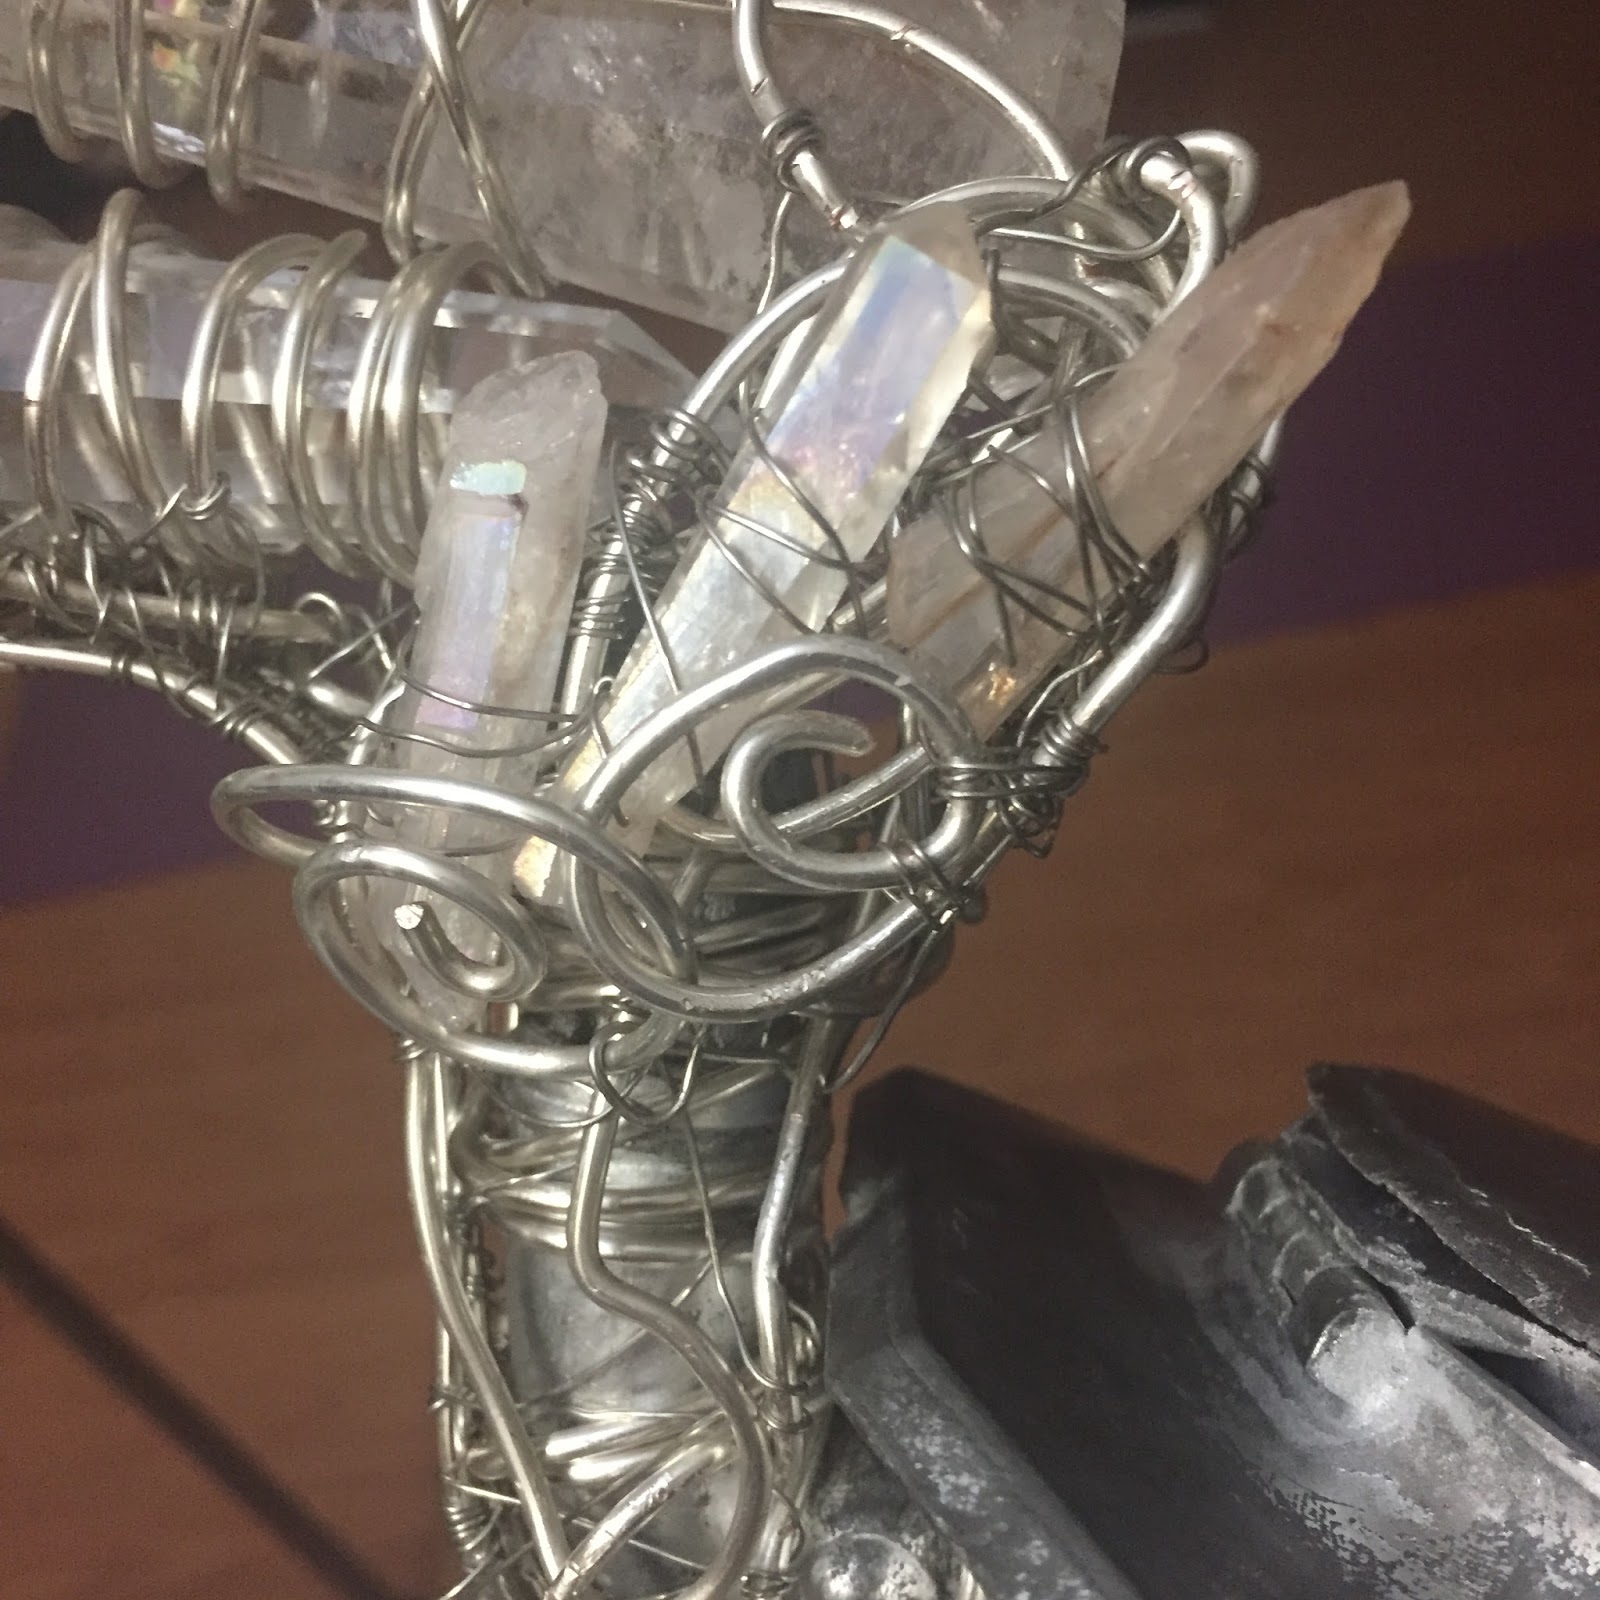
If the handle had NEVER been broken, It would never have become a project of gorgeously wrapped crystals & silver!

The crystals I wrapped with wire are called "healing crystals", and in its own way, the broken handle is now beyond healed. It's a metamorphosis into a piece of art. 

Does the crack in THE LIBERTY BELL make it UGLY, or does it give it character?

I say it gives it character! 

The hole need not be perfectly drilled, because it's still beautiful in it's uniqueness. It's misfortune didn't degrade it, but made it something something it would never have become.

But, I did not just make it for myself, I made it for you. Art is NOTHING unless it is shared, and SEEN. Now, all can see it, and enjoy it!

It's beauty can now become another tool for my photography art, and video.

But, also, now that I have made this, other can see how I have done it, why I have done it, and could opt to create their own, or something similar.


DIY Boho Decor Lanter Pot

There's more SLR Photography found on my Flickr.


Since I OFTEN get this question:
HOW DID YOU GET THE SPARKLE EFFECT?

It's a really old school analogue technique. you get an old school star or cross filter and screw it onto the lens. The one I used is just a simple 4-point cross star filter, but there's many other ones, like 8 point, 16 point, etc.

You can buy them on Amazon. It's better to shop on 3 day Holiday weekends, national Holidays, and Cyber Monday because the cost is even cheaper, but they're not expensive anyway.

I almost never pay full price for analogue filters because I shop when they have sales. I have a lot, and I always want more.

Actually, you'll NEVER be able to get EXACTLY this type of effect in Photoshop, similar, but NOT THE SAME. It's shot on the fly, and is based on the angles of how the light waves pass through the filter. Photoshop can't do that, and each frame will differ. Also, for all the tie you spend trying to copy this effect in Photoshop, I could shot hundreds of frames, and all unique.

Sometimes post editing is a waste of time if you can do it better LIVE and in the moment with practiced technique, or sometimes spontaneous accidents. As much as I love Photoshop, I would NEVER use Photoshop to make a sparkle like these. The limitations of the analogue are what make it better.

I have not edited these at all, except to shrink the size (because I shoot on RAW) and to add the text. That's it. I also used a tripod.

DIY Boho Teapot Lantern Project: LED Lights

For the past few years, when trying to explain this project, what it was, and what I as doing/,making, I often met with bewildered blank stairs... probably because people don't move I the same circles or spheres which I do, including other artist friends I have & know. Also, a major setback with completing this project was poverty. Yet, the inspiration was still STRONGLY within me, and I never gave up!

One thing that was often told to me was:
Well, I want to see that when it's finished! Send me a photo of that when you're done!


Even tho' people were very familiar with using LED string/wire lights in decor is a very popular practice for the past few years, which you can see all over any craft store, and even Wal-mart, Target, Kohl's, Marshall's, and even sometimes at CVS or Walgreen's, and people were familiar with my other lantern works, nobody really understood me when i trued to explain this.

Anyways, I wet to Michael's craft store and I saw a full display on sale of a wide variety of these, and even tho' I was originally thinking of white or warm gold, I was really drawn to the blues. I as also tempted to get a purple, but didn't.

Something about the blues really drew me to them. They are 2 different types of blue, and have a really brilliant glow, so I think that have magnesium in them but also they don;t quite show true to color as the human eye can see them when photographed. Actually, they're both a variation of cyan or turquoise blue, but the one is slightly indigo colored.


I had to unravel the lights, then coil them back up and insert them within the pot/lantern. The other string has to be forced through the spout.


The lantern appears to be pouring light. there's a lot of symbolism & metaphors in this symbology I used here.


I have also been video documenting this process of creating this project.

And I have also shot some SLR photography with my new camera.


DIY Boho Teapot Lantern Project: Crystal Wire Wrapping

Over the process of wire wrapping the crystals, I got sick from sinusitis, and also was trying to juggle some research at the same time. Much of this process didn't get video documented, but I will still try to video edit the footage I got.


See that broken handle on the vintage pewter pot? The main reason no one wanted it, and cast it off as "a piece of junk" was the sole reason why I wanted it. (It also has a big dent in it. But, to me, it shall be a figurative "Persian Flaw".) Well, that broken handle is what will make this a major piece of whimsical art!


A post shared by Kandice Kathleen Zimbleman 任思麒 (@blackunigryphon) on

A post shared by Kandice Kathleen Zimbleman 任思麒 (@blackunigryphon) on

A post shared by Kandice Kathleen Zimbleman 任思麒 (@blackunigryphon) on


A post shared by Kandice Kathleen Zimbleman 任思麒 (@blackunigryphon) on


In my original design concept I only wanted a small crystal to be wire wrapped to the handle, and then reinforced. But, I ended up having 3 crystals thanks to Jet International due to a mistake which changed to generosity & kindness. 

So, It evolved into 3 crystals... but, when I as at Michael's Craft Store I saw some drilled crystal point beads, and that also became part of the mix.


A post shared by Kandice Kathleen Zimbleman 任思麒 (@blackunigryphon) on


After I was done with the wire wrapping, I had to do some spray paint retouch-ups, and I had to cover the crystals with plastic wrap in layers. Then, after that I had to spray it with layers of shellac.

I couldn't do it while it was raining, nor while it was ultra humid, because it would mess up the process. And, I was also sick, so I had to be careful as to not harm myself.

Once the paint and the shellac were all set, I could move onto the LED lights, but I had to wait until the following day to be completely sure the layers of paint and shellac were totally set.

I also put the knob back on.

Oh, and by the way: It's rather heavy from all the wire.